 Facebook is the most prominent free social media platform with a plethora of convenient and exciting features. It is accessible across all platforms and operating systems. Users can enjoy every feature on devices like iPhone, Android, Laptops, and Desktops. With over two billion active users, it has become the largest social media platform amongst others. Facebook provides a secure and user-friendly solution and enables its users to share photographs, text, videos, and links with their friends, family, colleagues, and acquaintances. Facebook even allows you to create pages representing a community or a brand and profiles as per your preference – including the things you like, basic details, personal information, and more. It even lets you change or modify your pages conveniently. You will find how to make a poll on Facebook in this blog.
STEPS TO CREATE A FACEBOOK POLL ON STORY The Facebook poll is an excellent feature that helps you gain specific insight into your customers’ or friends’ opinions. To know how to make a poll on Facebook, please follow the steps mentioned below: ● Firstly, open your Facebook mobile application on your Smartphone and log into your account, if required. ● Select ‘Add to Story’ from the top of your news feed to open the story screen, where you will need to add a picture or a video as the background of your poll. ● On the top-right of your screen, select ‘Poll.’ ● Tap on the text box to insert your question along with the desired choices ● Once satisfied with the question and the alternatives, tap on ‘Share to Story.’ STEPS TO CREATE A FACEBOOK POLL ON GROUP If you want to create poll on Facebook group, follow the steps below: ● Open the Facebook mobile application on your Smartphone and tap on ‘Groups’ to select the desired group you wish to share the poll with. ● Tap on the text box; you will see the ‘Add to your post’ option and three dots next to it – tap on it and select ‘Polls’ from the options. ● Type your question next with the two alternatives, and tap on ‘Post’ to publish the poll. If you wondered how to make a poll on Facebook, following the mentioned steps successfully should have achieved you the same. If you need more information, please feel free to visit our other blogs, where you can find relevant details on Facebook.
0 Comments
 Facebook is the largest social media network that allows users to form a virtual connection with their family, friends, colleagues, and others. With attractive features including sharing photos and videos, Facebook polls, adjustable privacy settings, likes and shares, Facebook live, a news feed, and much more, Facebook rapidly gained popularity. Due to its sheer interactive nature, it causes the users to engage on this network for hours. Moreover, it enables users to make necessary modifications to their profile; users can also change Facebook page name or profile. You can find the steps on how to change your name on Facebook: page name and profile name in this blog. You can make these changes using your desktop or computer.
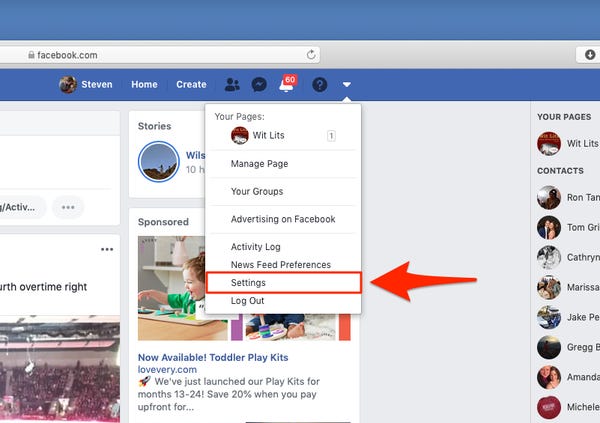
STEPS TO CHANGE FACEBOOK PAGE NAME ON DESKTOP The process of changing your Facebook page name is relatively simple, provided the steps or instructions. On the contrary, it may seem a little tricky if users aren’t aware of the process. To change Facebook page name, please implement the following steps. ● Login to your Facebook account on browser and find your business page under the page management link ● Click on the three ellipses next to the like, follow, and share options, and select Edit page info ● Scroll down the page to click on See All Information ● Then, click on Edit next to your name and enter the new name ● Click on Review your request followed by a click on Request change Please be patient till Facebook approves your name change request. Your new name shall appear as soon as Facebook approves your request. STEPS TO CHANGE FACEBOOK PROFILE NAME To change name on Facebook profile, please implement the following steps. ● Open the browser on your desktop and insert Facebook.com in the URL and press Enter to launch the page ● Locate a downward arrow at the top-right corner of your screen and click on it to reveal a drop-down menu ● Click on Settings & Privacy, then click on Settings ● Click on General from the left column to open General settings on the right side of the page ● The first option on the right is Name; click on the Edit option next to it ● Change your name as per your reference and click on Review Change ● Lastly, click on Save changes Using the steps on how to change your name on Facebook mentioned in this blog, you can change your Facebook profile name and your business page name easily. Please make sure to follow the Facebook guidelines while deciding on a new name for Facebook. For more information, please visit our other blogs.  Facebook is a social media network widely known for its interesting feature and huge user base. It offers features like Facebook polls, Events, Groups, Games, Share (Photos and Videos), Live Chat, and many more. It is not only great for a personal account but also significantly beneficial for professional purposes like boosting your business by reaching out to thousands of people without having to move an inch – as all is done virtually. Upon Facebook’s launch, it has taken the entire social media network by storm by creating a magnitude in the industry. It is an excellent way to reach out to people by creating a page on Facebook. But what would you do if you wished to change the name on your Facebook page? We have curated this blog to teach you how to rename Facebook page name, and while we are at it, you will also find how to change the name on your personal profile.
STEPS TO RENAME FACEBOOK PAGE CHANGE The first thing to ensure is that you are the admin of the Page that you are trying to rename. If you aren’t the admin, kindly ask the present admin to share his/her admin rights with you so you can do the needful. Now, we must move on to the process.
STEPS TO CHANGE NAME ON FACEBOOK If you do not own a page on Facebook but wish to change your profile name, this segment is for you. To know how to change my name on Facebook, kindly follow the steps mentioned below.
This is how to change my name on Facebook. Please follow all steps to make necessary changes in both the Facebook page and Facebook profile name. You can find more information in our other blogs if you need additional assistance.  Facebook is a widely-recognized social media platform developed to connect users virtually from all over the world. It also allows its users to share images, videos, status, amongst other features. However, some people may not be comfortable with sharing their life with unknown people on this platform. Facebook has kept this in mind and has successfully built a feature where users can turn their Facebook private and only socialize with their friends on the platform. This feature allows the users to use the platform comfortably without being worried about sharing their information with strangers. If you have queries like how do I make my Facebook private? or How do I change Facebook full site privacy settings? this blog is for you.
TURN FACEBOOK PRIVATE The answer to your question, How do I make my Facebook private is by changing the settings of each feature you want to turn to private. You can turn everything, including posts, profile information, albums, and Friends list, private. To do it, follow the steps mentioned in this blog.
FACEBOOK FULL SITE PRIVACY SETTINGS Facebook full site privacy settings include Friends list, profile, tags in photos, and photo albums. In this blog, you will learn how to make each private on Facebook. Please mind that these instructions are specific to Facebook on the desktop. HOW TO: FACEBOOK FRIENDS LIST PRIVATE Open the Settings & Privacy screen by clicking on the downward arrow present on the top-right corner of the home screen, and then select See more settings to reveal a list of options on your left. From this list of options, click on Privacy. Now select the fifth option on the right side of the screen – Who can see your friends list. Click on Edit right next to it and change it to Friends or Only me. HOW TO: FACEBOOK PROFILE PRIVATE Open Settings on your Facebook, then select General and click on General Account Settings. All your information will appear on the screen, click on Edit next to each information and change the setting to Friends or Only me to secure privacy. Click on Save to save settings. HOW TO: PHOTO ALBUMS PRIVATE Another element to Facebook Full site privacy settings is Private photo albums. Open your profile on Facebook and select Photos. All your albums will open, choose an album and select Edit Album. You can select the audience in this option, select your appropriate audience – either Friends or Only me, and save. The instructions mentioned in this blog will help you change your profile completely and turn it private to use Facebook without worrying about sharing your information with complete strangers. This way, you can easily adjust Facebook as per your convenience and preferences. You can check our other blogs for more information on Facebook features and how to modify them.  Running a Facebook poll for your friends and followers is an excellent way to help make decisions, spot-check opinions, and create some debates. You can also share the polls now on Messenger. It will be easy now to help coordinate activities while you can also share opinions by voting in your group chats. The polls feature is not hard to use and also lets you skip prolonged discussions around the best time for your virtual happy go hour.
In this article, you will get to know how to start a poll on Facebook and also to create a poll in messenger. The methods are given below step by step. You need to follow the procedure carefully without leaving any step. How do I create a poll on Facebook via Android & iOS Devices? To know how to start a poll on Facebook, you need to follow the steps given below. You can do it on Facebook applications on Android and iOS. It takes only these five simple steps:
Steps to create a poll in messenger To create a poll in messenger, follow the steps below. Make sure that you don’t leave any step behind.
By following the above methods, you will know how to start a poll on Facebook hassle-free. To create a poll in messenger, you will see the above steps are there to help you.  Facebook Mobile Application usually disables the native screenshot function in Android for profile pictures or other photos protected by ‘Profile Picture Guard’ or other privacy options. Still, there are most third party apps that do not follow this rule. If you want to know how to take screenshot on Facebook when it is protected, then use any third-party app available at the Google Play Store. It will help you to take a screenshot of the phone display to get any photos on Facebook. Here we will give you instructions to take a Facebook screenshot on profile pictures or stories not protected by the ‘Profile Picture Guard’ feature.
Take Facebook Screenshots on Windows, Android & iPhone The most common question we come across by Facebook users is this – how to take screenshot on Facebook? To know how to take a Facebook screenshot, you need to know first have an account on Facebook, allowing you to take a screenshot. For Windows, You need to click the “PrtScn” button on your keyboard. It will automatically capture active windows on your desktop. After this, you need to open ‘Paint’ and paste the image with a shortcut ‘Ctrl+V’ and then save the captured image as JPEG or PNG format.For Android, you can use the power button with volume button and press and hold it for a second. You will get your screenshot there. If you are looking for ways to take a screenshot on iPhone, you need to do the same as Android but this time, instead of the power button, uses the home button on iPhone. Does Facebook report screenshots? Facebook does not report screenshots of any of its users, but it keeps in mind cyber-security. So you can freely take a Facebook screenshot of stories and posts. However, keep in mind that if you inappropriately use the screenshots, it will have its consequences. You need to take care of where you are using the screenshot, whether it is just for detail, memory, or misusing it. 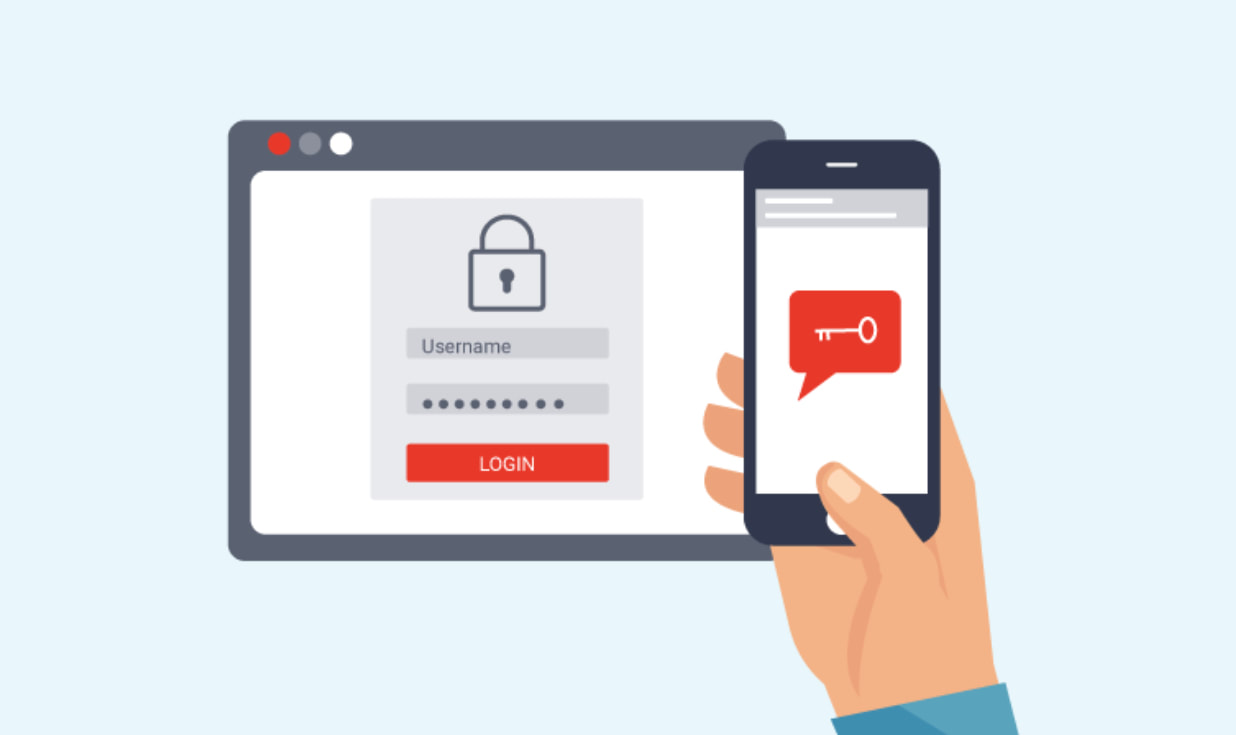 With 2.6 billion active users, Facebook is one of the most popular social media platforms in the world. Features ranging from message chats and video calling to managing marketing efforts and shooting live videos, Facebook covers them all. Keeping the features apart, Facebook has now come up with extended efforts toward security of your account. The two-factor authentication is one such step that helps you keep your Facebook account and your login password secure. Read on to explore how to activate this two-factor authentication feature and ensure the safety of your Facebook account.
What is Facebook Two-Factor Authentication and How Does It Work? The two-factor authentication on Facebook is a security feature that enables you to protect your Facebook account. Once you enable the two-factor authentication, you need to enter a specific login code to confirm your identity. In addition, if someone tries to log into your Facebook account from any unrecognized device, the user needs to confirm the login attempt by entering the specific login code. If it's not you who’s trying to log in, you will receive alerts on your mobile phone and your registered email address. Enabling the Facebook two-factor authentication requires you to perform the following steps: 1. Log into your Facebook account using appropriate login credentials. 2. Click on the “Security and Login” settings. 3. Scroll down the page and click on “Use two-factor authentication”. 4. Click on Edit and select the security method you want to add. After enabling the two-factor authentication, you need to select one of the two security methods listed below:
Using the two-factor authentication requires you to have at least one of the above-mentioned setups. After adding either of the options listed above, you can set up some of the optional techniques as listed under:
Facebook Two Factor Authentication Not Working? Here’s The Fix! Instances occur when you successfully turn on the two-factor authentication feature on Facebook; however, you notice that it is not working and you are not receiving any verification code on your mobile. While there could be various reasons why you aren’t receiving the code on your mobile, you can wait for a while for the message to be delivered to your SMS Inbox. If there is a delay in receiving the Facebook two-factor authentication code, you can contact the service provider of your telecom network and ask for a resolution. In case you are logged in to your Facebook account from another device or web browser, check your notifications; however, if you already have the recovery codes, you can use them to approve the login attempts. Tips to Bypass Two-Factor Authentication in Facebook The methods of bypassing the two-factor authentication are based on tricks with the design and implementation which are often overlooked by the website application administrators. If you are wondering how to bypass two-factor authentication Facebook, follow the below-mentioned techniques:
1. Open the Facebook login page on your computer and click on the “Forgot Password” option to perform a Facebook code generator bypass. 2. On the next screen, enter your email ID or the phone number. 3. Request a verification code on your registered email address. 4. Lastly, complete the verification process and reset your Facebook account password.
How to Use Facebook Code Generator in Smartphone? Now that you have understood what Facebook two-factor authentication is and how to bypass it, read on to explore how to use the Facebook code generator on your Smartphone. First, on your Android or IOS smartphone, open the Facebook app and log into your account. Next, tap on the three horizontal bars located at the top-right hand side of the app. Select the “Setting and Privacy” option and then tap on the code generator. To get the security code, tap on the “activate” button and activate the two-factor authentication in your Facebook account. Lastly, you could see a tool that generates the security code every one minute. All you need to do is enter the code in the two-factor authentication boxes on the device you want to log into your Facebook account. Facebook two-factor authentication provides you an excellent opportunity to keep your account secured from potential online threats. You can follow some simple steps to activate this feature on your Facebook account. However, if you need to bypass the two-factor authentication, follow the various methods listed here and regain access to your Facebook account instantly. |
Author'Alice Cook' is been working for the last 5 years as the strategists and senior digital leader with a core skill set in digital marketing, digital transformation. Work at Contactforhelp. Archives
June 2021
Categories
All
|
 RSS Feed
